Electron 进程通信
渲染进程到主进程(单项)
主要使用的api如下:
ipcMain.on
ipcRenderer.send
我们一般使用web界面,向主进程进行发送信息。
demo如下:
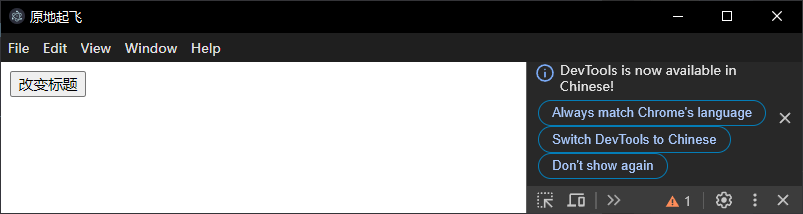
写一个将程序窗口标题设置为index.html标题的功能:
main.js
1
2
3
4
5
6
7
8
9
10
11
12
13
14
15
16
17
18
19
20
21
22
23
24
25
26
27
28
29
30
31
32
33
34
35
| const {BrowserWindow,app,ipcMain} = require("electron")
const path = require("path")
function createWin(){
const win = new BrowserWindow({
width:200,
height:200,
webPreferences:{
preload: path.join(__dirname,"preload.js")
}
})
win.loadFile("index.html")
win.webContents.openDevTools()
ipcMain.on("set-title",(event,value)=>{
console.log(event.sender,value)
const webContents = event.sender
const win = BrowserWindow.fromWebContents(webContents)
win.setTitle(value)
})
}
app.whenReady().then(()=>{
createWin()
app.on('activate', function () {
if (BrowserWindow.getAllWindows().length === 0) createWindow()
})
})
app.on('window-all-closed', function () {
if (process.platform !== 'darwin') app.quit()
})
|
preload.js
预加载脚本,沟通主进程和渲染进程的桥梁
1
2
3
4
5
6
7
| const {contextBridge,ipcRenderer} = require("electron")
contextBridge.exposeInMainWorld("electronAPI",{
setTitle:(title)=>ipcRenderer.send("set-title",title)
})
|
没错上文的ipcRenderer.send就是把事件发给主进程
index.html && render.js
1
2
3
4
5
6
7
8
9
10
11
12
13
14
15
16
17
18
19
20
| <!DOCTYPE html>
<html lang="en">
<head>
<meta charset="UTF-8" />
<meta name="viewport" content="width=device-width, initial-scale=1.0" />
<title>Documenthahah</title>
</head>
<body>
<button id="go">改变标题</button>
<script src="render.js"></script>
</body>
</html>
---render.js
const btn = document.getElementById("go")
btn.addEventListener("click",()=>{
console.log("运行了")
window.electronAPI.setTitle("原地起飞")
})
|
这样子就实现了一个我点击按钮以后窗口标题变更的功能。
主进程与渲染进程通信
使用的主要api
WebContents
main.js
整个菜单,菜单后面说,这个是我直接copy的官方案例,
mainWindow.webContents.send
注意这个位置,这个位置声明了是哪个窗口,这个操作窗口是主窗口webContents的send
1
2
3
4
5
6
7
8
9
10
11
12
13
14
15
16
17
18
19
20
21
22
23
24
25
26
27
28
29
30
31
32
33
34
35
36
37
38
39
40
41
42
43
44
45
46
47
48
| const { app, BrowserWindow, Menu, ipcMain } = require('electron/main')
const path = require('node:path')
function createWindow () {
const mainWindow = new BrowserWindow({
webPreferences: {
preload: path.join(__dirname, 'preload.js')
}
})
const menu = Menu.buildFromTemplate([
{
label: app.name,
submenu: [
{
click: () => mainWindow.webContents.send('update-counter', 1),
label: 'Increment'
},
{
click: () => mainWindow.webContents.send('update-counter', -1),
label: 'Decrement'
}
]
}
])
Menu.setApplicationMenu(menu)
mainWindow.loadFile('index.html')
mainWindow.webContents.openDevTools()
}
app.whenReady().then(() => {
ipcMain.on('counter-value', (_event, value) => {
console.log(value)
})
createWindow()
app.on('activate', function () {
if (BrowserWindow.getAllWindows().length === 0) createWindow()
})
})
app.on('window-all-closed', function () {
if (process.platform !== 'darwin') app.quit()
})
|
依旧是预渲染脚本
preload.js
这次暴露两个接口,因为是主进程通信渲染接口,所以中间值使用了ipcRenderer.on监听主进程的传值:主进程的核心代码在这里:mainWindow.webContents.send('update-counter', 1)会给一个1,刚刚好对应的就是运行的函数(_event, value) => callback(value)并且闭包接收一个callback,此时这个callback,就可以在对应的render定义行为了。
1
2
3
4
5
6
| const { contextBridge, ipcRenderer } = require('electron/renderer')
contextBridge.exposeInMainWorld('electronAPI', {
onUpdateCounter: (callback) => ipcRenderer.on('update-counter', (_event, value) => callback(value)),
counterValue: (value) => ipcRenderer.send('counter-value', value)
})
|
render.js
1
2
3
4
5
6
7
8
| const counter = document.getElementById('counter')
window.electronAPI.onUpdateCounter((value) => {
const oldValue = Number(counter.innerText)
const newValue = oldValue + value
counter.innerText = newValue.toString()
window.electronAPI.counterValue(newValue)
})
|
主进程和渲染进程双向通信
- 首先关于双向通信,其实可以把上面的两种方案结合起来,上面的两种方案结合起来。
- 使用进程通信给予的:
- ipcRenderer.invoke
- ipcMain.handle
融会贯通写法
我们来实践一下方法一:
也就是融会之前所学的ipcRenderer.on 和 ipcRenderer.send进行操作。
我们写了一个关于index.html,一个按钮用来改变窗口标题。
我们要经过renderer发送消息让main.js进行改变标题,改变完以后main.js要告诉renderder完成了。
具体代码如下:
index.html
1
2
3
4
5
6
7
8
9
10
11
12
13
14
| <!DOCTYPE html>
<html lang="en">
<head>
<meta charset="UTF-8" />
<meta name="viewport" content="width=device-width, initial-scale=1.0" />
<title>Documenthahah</title>
</head>
<body>
<button id="go">改变标题</button>
<p id="status"></p>
<script src="render.js"></script>
</body>
</html>
|
render.js
1
2
3
4
5
6
7
8
9
10
11
12
13
14
| window.addEventListener("DOMContentLoaded",()=>{
const btn = document.getElementById("go")
const status = document.getElementById("status")
btn.addEventListener("click",()=>{
console.log("运行了")
window.electronAPI.setTitle("原地起飞")
})
window.mainToRenderer.res((res)=>{
status.innerText = res
})
})
|
preload.js
1
2
3
4
5
6
7
8
9
10
11
12
| const {contextBridge,ipcRenderer} = require("electron")
contextBridge.exposeInMainWorld("electronAPI",{
setTitle:(title)=>ipcRenderer.send("set-title",title)
})
contextBridge.exposeInMainWorld("mainToRenderer",{
res:(callback) => ipcRenderer.on("msg",(_event,value)=>{
callback(value)
})
})
|
main.js
1
2
3
4
5
6
7
8
9
10
11
12
13
14
15
16
17
18
19
20
21
22
23
24
25
26
27
28
29
30
31
32
33
34
35
36
| const {BrowserWindow,app,ipcMain} = require("electron")
const path = require("path")
function createWin(){
const win = new BrowserWindow({
width:200,
height:200,
webPreferences:{
preload: path.join(__dirname,"preload.js")
}
})
win.loadFile("index.html")
win.webContents.openDevTools()
ipcMain.on("set-title",(event,value)=>{
console.log(event.sender,value)
const webContents = event.sender
const win = BrowserWindow.fromWebContents(webContents)
win.setTitle(value)
BrowserWindow.fromWebContents(event.sender).send('msg','已经收到通知')
})
}
app.whenReady().then(()=>{
createWin()
app.on('activate', function () {
if (BrowserWindow.getAllWindows().length === 0) createWindow()
})
})
app.on('window-all-closed', function () {
if (process.platform !== 'darwin') app.quit()
})
|
官方使用invoke,handle写法
这个部分官方的案例写的非常明白,所以我就不多说了,在部分代码中我写了注释
main.js
1
2
3
4
5
6
7
8
9
10
11
12
13
14
15
16
17
18
19
20
21
22
23
24
25
26
27
28
29
30
| const { app, BrowserWindow, ipcMain, dialog } = require('electron/main')
const path = require('node:path')
async function handleFileOpen () {
const { canceled, filePaths } = await dialog.showOpenDialog()
if (!canceled) {
return filePaths[0]
}
}
function createWindow () {
const mainWindow = new BrowserWindow({
webPreferences: {
preload: path.join(__dirname, 'preload.js')
}
})
mainWindow.loadFile('index.html')
}
app.whenReady().then(() => {
ipcMain.handle('dialog:openFile', handleFileOpen)
createWindow()
app.on('activate', function () {
if (BrowserWindow.getAllWindows().length === 0) createWindow()
})
})
app.on('window-all-closed', function () {
if (process.platform !== 'darwin') app.quit()
})
|
preload.js
1
2
3
4
5
| const { contextBridge, ipcRenderer } = require('electron/renderer')
contextBridge.exposeInMainWorld('electronAPI', {
openFile: () => ipcRenderer.invoke('dialog:openFile')
})
|
index.html
1
2
3
4
5
6
7
8
9
10
11
12
13
14
| <!DOCTYPE html>
<html>
<head>
<meta charset="UTF-8">
<meta http-equiv="Content-Security-Policy" content="default-src 'self'; script-src 'self'">
<title>Dialog</title>
</head>
<body>
<button type="button" id="btn">Open a File</button>
File path: <strong id="filePath"></strong>
<script src='./renderer.js'></script>
</body>
</html>
|
renderer.js
1
2
3
4
5
6
7
| const btn = document.getElementById('btn')
const filePathElement = document.getElementById('filePath')
btn.addEventListener('click', async () => {
const filePath = await window.electronAPI.openFile()
filePathElement.innerText = filePath
})
|


![Langchain系列[20]与SQL数据库进行聊天](/img/langchain/cover.png)